
by Zalbar
Apprentice. Journeyman. Master. Not only are they a measure of a craftsman’s skill, they are also an institutionalized methods of learning. The apprentice learns first through observation, then by mimicking and practice, and finally having mastered one thing, moves on to the next. This method of teaching our craft has existed for hundreds of years and continues to this day. Even the greats of my generation learnt how to cook this way. These traditions are a way of life. A means of passing on the accumulated knowledge of the ages to the next generation so that they can take up their banner and replace them. Much as a proud father and mother pass the torch to their sons and daughters. The problem with this type of learning is that due to the very rigid and structured nature, questioning and innovation are not encouraged. Why do we do something in a particular way? Because it has always been done this way, and always will be. Through repetition and rote. Do not question, do not deviate. One omelette, two omelettes, three hundred omelettes.
Traditionalists abound, and even the younger ones will defend the old guard to their dying breath. This is very european. Their veneration for tradition is ingrained into their very bones. It’s one of the things that I think is a marked difference between european and american cooks. American cooks are more willing to experiment, to try new things. They have not been indoctrinated into the same culinary traditions. When european cooks come across the pond to america, they form their own culinary and cultural enclaves. Their bastions of tradition standing against the tides of change. Many american chefs send their cooks off to europe. They are told, go travel, go eat, go cook. I have not once met a cook that has come back that has not been changed by their journey. They spend time over there, and their experiences transform their food. However their cooking is influenced and inspired by, instead of taken over.
I’m not going to claim that one way is better than the other, I don’t believe that. I’m not going to say we should stereotype american and european cooks either. El Bulli in spain was probably the pinnacle of culinary innovation and I suspect they will continue to be so once they reopen in 2014. Personally, I’m more of a traditionalist and don’t really enjoy a lot of the culinary experiments that are taking place, but I respect them. Everything has it’s place, and the next whacked out sous-vide-liquid nitrogen-xanthan gum-spherical-tomato water-ice cream-wafer sprinkle flake may become as common as chopped basil in the future. Who knows.
What brought this all up was when I observed some rather heated discussions going on about poaching steak (for the hell of it apparently), using sous-vide, and new versus traditional methods. One chef even tossing out “So one steak is cooked three times and chilled twice in zip lock bags before you put it on my plate? What has happened to real cooking?” It was quite the discussion. Both sides had their points, but some of the closed mindedness was unsettling in the least. Funnily enough it wasn’t the old guard that were being so closed minded, they just stated their opinion and left it at that. It was their younger proteges that seemed to be the most vehemently vocal, railing against the fuzzy wrong headedness of their colleagues deigning to experiment with callous aloofness to tradition. I’ve seen this same attitude with bakers and no-knead bread. It is not bread they claim. There is no depth of flavor. No kneading? No art. Ridiculous. Never. You. Are. Wrong.
Following this, I could not stop thinking about how we grow and learn in this craft, this passion of ours. How we pass on our knowledge. Which I believe is a responsability and a duty for anyone with an interest in cooking. How things change over time. How very wrong it is to dismiss anything as it is stifling progress. It is limiting innovation. If at first you don’t succeed try, try again. While some may decry the innovators of the time, eventually some of those practices become a part of our culinary heritage.
Although prepping a salad is seemingly a simple culinary task, there are a few tips and tricks to keep in mind when selecting your greens and then later turning them into a delicious course.
When at all possible, try to use young, fresh greens. Young salad greens have a more tender and delicate flavor, where as older, “over-grown,” salad greens tend to be more fibrous, giving off a somewhat rubbery texture.
Slice your greens, don’t tear. There is a common misconception that for some reason tearing your salad greens is better than slicing them with a sharp knife. However, tearing salad leaves force you to grip them firmly, potentially crushing cell walls, which will ultimately cause bruising and wilting. Instead, use a sharp chefs knife to cut your leaves down to size if you feel they are too big.
Don’t wash lettuce leaves directly under running water. The pressurized water coming from the faucet has enough force to crush the lettuce green’s cell walls, causing bruising and browning. Instead, place the lettuce greens in a sink filled with cold water and agitate gently with your hands. Switch out the water when it becomes dirty and repeat until the salad greens are nice and clean.
Soak your greens for a couple of minutes in ice water, especially if they aren’t quite as crisp as you would like them to be or they’re showing signs of wilting due to age. Soaking them for a few minutes in ice water will replace any water-loss from their cell walls, bringing back their nice, crispy texture.
Use a salad spinner to dry greens. The centrifugal force of a salad spinner will make sure that salad greens are thoroughly dried. Patting dry with a towel is inefficient and could cause bruising. Also, salad greens that have too much excess moisture on the surface of their leaves will repel a vinaigrette, making it hard to actually dress the salad properly.
Store in a clean container, with damp paper towels. Wet some paper towels and then ring out the excess moisture until they are just slightly damp. Line the bottom of your storage container with damp paper towels, and then cover the top of the greens with more damp towels. Do not store in an airtight container or cover with plastic wrap. Salad greens need to breath.

|
|
|
|---|
Based on multiple requests, I'm happy to announce the Stella Culinary Super Feed. This feed will allow you to subscribe to free automatic updates either through iTunes or traditional RSS (using the "aggregator" of your choice). This means that every video and audio podcast released will be available through this one, simple to subscribe to, "Super Feed."
If you're already familiar with how to subscribe to podcasts via iTunes or RSS, simply click on the corresponding links above and you'll be set. If you're unsure how this free subscription process works, then read on.
How to Subscribe Via iTunes

To subscribe to the Stella Culinary Super Feed using iTunes, simply click the iTunes link at the top of this post. A new window in your browser will open, revealing the feed in iTunes format.
Click the "View in iTunes" button found on the left hand side of the new browser window. A dialog box will pop up, asking if you want to launch iTunes (if it's not already open). Click "OK".
When iTunes launches, you will be taken directly to the Stella Culinary Super Feed Page.
Click on the "Subscribe Free" button found right underneath the Super Feed logo. When the dialog box pops up and asks if you're sure, click the "Subscribe" button.
You're all set. Now you can stream all of our videos and podcasts to your Apple TV or load them on your iPhone, iPad or iPod so you can study on the go.
Please take a second to leave Stella Culinary a review on the Super Feed iTunes Page.
Subscribing With Traditional RSS
RSS stands for "Really Simple Syndication" and is a convenient way to stay up to date on your favorite blogs and podcasts. Before RSS, you would have to go to each individual content producer and see if they had posted anything new. With RSS, you can "Subscribe" to your favorite content producers' digital feed using a "News Reader." This way, all you have to do it check your news reader to see if any new content has been published.
My personal favorite RSS Aggregator is Google Reader. It's easy to use, and since I already have a Google Account, it's extremely convenient.

To subscribe to the Stella Culinary Super Feed through traditional RSS, click on the "RSS" icon located at the top of this page.
A new browser window will open and in the top right hand corner of the window, you'll have multiple options on what feed aggregator you want to use. Since I have a Google Account, I'll click on the "+ Google" button.
The next window will ask if you want to add this feed to your Google Home Page or your Google Reader. Since I use Google Reader to keep track of all my favorite websites, that's the option I'll choose.
If using a different RSS Reader that isn't listed, simply copy the RSS feed (http://feeds.feedburner.com/StellaCulinarySuperFeed) and paste it into the URL field under "Add New Feed."
UPDATE: You can find our instructional video on how to make mayonnaise here.
Like many of the mother sauces, a well made mayonnaise is the base to an endless possibility of cold, emulsified sauces. Although now days there are many good quality commercial mayonnaise available, understanding how to make a mayonnaise is basic knowledge that every cook or chef should have. Not to mention, that with the selection and use of high quality products, fresh made mayonnaise can have a far superior flavor to that of its commercial counterparts.
Some Guidelines for Making Mayonnaise
Use a blender, food processor or a stand-top mixer with a whisk attachment. Not only will it ensure that your arm doesn’t fall off from hand whisking, but the shearing power of these devices is capable of breaking the oil into much smaller droplets, making a more stable emulsion.
Have both your egg yolks and oil at room temperature before starting. It will make the emulsification process much easier.
Use the freshest eggs possible, preferably organic from a farmer’s market. If cooking for children or the elderly, pasteurized egg yolks are always recommended.
Standard Ratio for Mayonnaise
At it’s most basic level, mayonnaise is simply a neutral oil emulsified into egg yolks. The ratio for a basic mayonnaise is:
1 yolk per 1 cup of neutral oil (canola, safflower, grape seed).
Although many classical recipes call for the addition of other ingredients, egg yolks and oil are all you need to make a mayonnaise. Some additional ingredients that are used to season mayonnaise are:
Vinegar
Salt
Pepper (usually white)
Dry Mustard
Cayenne Pepper
Lemon Juice
Standard Recipe For 2 Cups of Mayonnaise
2 egg yolks
1/2 table spoon of vinegar
1/2 teaspoon salt
1/2 teaspoon dry mustard
Small Pinch cayenne
2 cups Salad Oil (canola preferred)
1 Tablespoon Vinegar
1-2 Tablespoons Lemon Juice
Put ingredients 1-5 into a blender, food processor or KitchenAid with a whisk attachment and mix well.
Very slowly at first, start streaming in your oil, a little at a time until your emulsification starts to form.
Use the 1 tablespoon of vinegar to thin the mayonnaise if it starts to become too thick before the emulsification is complete.
Once all the oil is incorporated into egg yolks and the mayonnaise is finished, it should be thick enough to be turned upside down without the mayonnaise coming out of the mixing container.
Adjust the final seasoning with the lemon juice, salt and pepper (white, cayenne or black pepper depending on preference).
What’s The Difference Between Mayonnaise and Aioli
A common question asked is what’s the difference between mayonnaise and aioli. Now days, the term aioli has been bastardized by some chefs to be synonymous with any flavored mayonnaise. However, there is an exacting classical distinction between mayonnaise and aioli.
The difference between mayonnaise and aioli is the simple fact that aioli is made with extra virgin olive oil and has the addition of crushed garlic. So to make aioli, follow the standard recipe above, but instead, substitute the canola oil for extra virgin olive oil and add 1 tablespoon of fresh minced garlic to the egg yolks during the blending/beating process.
The simplified ratio for Aioli is:
1 egg yolk + 1 cup extra virgin olive oil + 1 teaspoon of crushed garlic = Aioli.
This ratio can be seasoned with lemon juice, salt and pepper to yield a simple and traditional Aioli.
Mayonnaise Based Sauces
As stated before, mayonnaise is a great base to use for making other unique sauces. One of my all time favorite cook books “Charcuterie” by Michael Rhulman and Brian Polcyn, makes these suggestions:
For Pork try adding some cumin, cayenne and lime juice.
For Fish add saffron and garlic.
For Chicken add lemon juice and tarragon.
For Beef add a little fresh horse radish (I would also recommend some fresh chopped chives).
Another very traditional mayonnaise based sauce is Remoulade which is traditionally served with fish. To make a traditional remoulade you will need:
2 Cups of Mayonnaise
About 1 tablespoon of good Dijon
1/4 cup finely chopped cornichons (Tiny, French, Sweet Pickles)
Tablespoon chopped capers
1 anchovy fillet, finely chopped
3 tablespoons chopped parsey
1 teaspoon chopped fresh chervil
1 teaspoon chopped fresh tarragon
Mix all ingredients together and serve with fish. This is a great dipping sauce for fish and chips!
To make other mayonnaise based sauces, start with 2 cups of freshly made or neutral store bought mayonnaise and add:
Thousand Island Dressing: 1/2 cup chili sauce, 1/2 ounce minced onion, 1 ounce finely chopped green pepper, 1 ounce drained pimiento.
Louis Dressing: same as Thousand Island with the addition of 1/2 cup heavy cream.
Russian Dressing: 1/2 cup chili sauce or catsup, 1 ounce fresh horseradish, 1.2 ounce minced onion.
Chantilly: 1/2 cup of heavy creamed whipped until a stiff peak and added in just before service.
Blue Cheese Dressing: substitute one cup of mayonnaise for one cup of sour cream (optional but really good), add 1 ounce white vinegar, /2 teaspoon Worcestershire sauce, 4 ounces crumbled bleu cheese; thin with 1-2 cups heavy cream, half and half or buttermilk.
Ranch Dressing: 1 1/2 cups sour cream, 1/2 cup buttermilk, 2 ounces wine vinegar of your choice, 1/2 ounce lemon juice, 1/2 ounce Worcestershire sauce, 2 Tablespoons chopped parsley, 1 tablespoon chopped chives, 1-2 crushed garlic cloves, 1 scallion (green onion) finely chopped, 2 teaspoons celery seed.
What Is Stock?
A stock is a liquid made by slowly simmering ingredients in water to extract their flavor. The French word for stock is “fond,” meaning foundation, a true testament to just how important these flavored-liquids are to the cooking process. A great stock is one of the most important assets chefs and amateur cooks have at their disposals.
Ingredients Needed For Making Stock
There are four basic components to any great stock:
Bones – The key element (unless it is vegetarian), bones with a high collegian content (such as veal knuckle bones or chicken necks and wings) are best for making a traditional stock.
Mirepoix – Mirepoix, a mixture of onions, celery and carrots, is added to the stock for it’s aromatic qualities and to deepen the flavor of the stock. The basic ratio for classical mirepoix is:
2 Parts Onion
1 Part Celery
1 Part Carrot
Note: For every five pounds of bones, you will need 1 pound of mirepoix.
Water – Seems pretty self-explanatory, but there are some things to consider. The water in which you simmer the rest of your ingredients will make up a large percentage of your stock. If you live in an area with hard water, or just poor water quality in general, I would recommend using bottled water. You don’t have to go crazy, the filtered water that is dispensed into plastic jugs at your local supermarket will work just fine.
Sachet – There are no hard and fast rules to creating sachets. A sachet basically refers to aromatic herbs and spices that are tied up in a cheesecloth pouch and simmered with soups, sauces, or stocks to add extra flavor. A basic sachet for a stock will usually include:
Bay Leaf
Sprigs of Fresh Thyme
Whole Black Peppercorns
Whole Cloves
Parsley Stems
Note: The amount of each ingredient you add to your stock is based on personal preference and how much stock you will be making.
Basic Recipe for Protein- Based Stocks
5 pounds bones
1 pound Mirepoix
8 ounces tomato paste (If making veal stock)
Sachet: 5-10 Peppercorns, 5 sprigs thyme, 5 parsley stems, ½ bay leaf, 2 whole cloves
Water to cover
More Information
Take The Culinary Stocks Quiz (Please Listen To Part One & Two First)
A well seasoned cast iron pan is one of the most jealously guarded tools in a kitchen. Back before teflon pans were invented, these were the original non-stick pans that people used to cook eggs and other delicate items. Also, nothing really gives you a better seared crust than a good cast iron skillet.
To Season Your Cast Iron Pan
Preheat your oven to 350 degrees F.
If the pan is new, scrub with soapy water and dry thoroughly.
Place a table spoon of vegetable shortening or vegetable oil in the center of the pan.
Place the pan in the oven and allow the shortening to melt.
Once the shortening melts, rub it all around the inside of the pan with a paper towel.
Place pan back in oven, upside down, and back for about an hour.
Turn off the oven and let the pan cool down inside.
Wipe off any excess fat with a clean paper towel and store.
To clean your cast iron pan, after you are done using it, add some kosher salt and a little oil and scrub. Do not use soap or water. Wipe clean with a paper towel.
Update: This article was written a while back and is a method that's worked for me in the past. Yet we live in an ever changing culinary landscape. As more research is done, new techniques and methods are developed. Case in point, this great article by Sheryl Canter, Chemistry Of Cast Ironed Seasoning: A Science-Based-How-To
This was originally shared by Wisconsin Limey in This Forum Thread
Roux – Equal parts flour to fat (clarified butter is traditional). There are three different stages for rouxs including white, blond and brown. Full thickening power is not realized until sauce or soup is brought up to a simmer after the roux is incorporated. For ratios and more detailed guidelines, check out this post on how to make and use a roux.
Liason – A mixture of heavy cream and eggs, added just at the end of the cooking process to slightly thicken, but mostly enrich, sauces and soups. The standard ratio for a liaison is 16:1:2. So for every 16 ounces (or one pint) of sauce, you will need 1 egg yolk and 2 ounces of cream. The liaison will be tempered with up to 1/3 of the warm sauce or soup before incorporated. This helps to keep the eggs from coagulating. For more information, check out this post on how to make and use a liaison.
White Wash – A mixture of water and flour is whisked together into a “slurry” before being incorporated into a sauce. The water helps to hydrate the starch molecules in the flour, preventing the flour from clumping when it hits the hot sauce or soup. This is an extremely poor technique to use. It is only listed here for sake of completeness.
Beurre Manie – Also known as “The Lazy Chef’s Roux,” Beurre Manie is equal parts of flour and whole butter kneaded together until it forms something like a dough. Pieces of this dough are then broken apart and added to simmering sauces or soups to thicken them. It is recommend that you simmer the sauce for at least 20 minutes more to cook out any raw, starchy flavor the flour introduces. Use the same ratios of Beurre Manie that you would a Roux.
Corn Starch – Has twice the thickening power of flour. Most commonly added to a soup or sauce in a slurry form, using a 1:1 mixture of water to Corn Starch. To thicken a sauce or soup with the consistency of water to a traditional nape stage (coats the back of a spoon), you will need 2 oz of Corn Starch for every 1 qt of sauce or soup. Full thickening power will not be realized until your sauce begins to simmer. Corn Starch has tendency to give sauces a smooth and shinny appearance. It is used extensively in Asian cooking, especially Chinese Cuisine.
Arrow Root- Very similar to Corn Starch with the same thickening power. It is used exactly in the same fashion as Corn Starch to thicken sauces and soups. Has a much more neutral taste than Corn Starch, but tends to be more expensive. Most commonly added as a slurry, and its full thickening power is not realized until the sauce is brought to a simmer.
Farine – Literally the French word for “flour”. As a thickening technique it refers to dusting your product (usually a protein) in flour. The excess flour is then shaken off, and the product is sautéd. The pan is then usually de-glazed, and a sauce is built on top of this base. Also commonly used to build a base for thick soups and stews.
Panade – Most commonly used to stabilize and bind meat balls and pâtés, it is usually a mixture of day old bread and some sort of liquid; stock, milk, water, etc. In the case of thickening sauces or soups, the bread is usually browned in butter and then simmered into the base that you wish to thicken. It can either be left as is, or blended and strained for a more refined consistency.
Food Grade Gums – Food grade gums are really emerging as the thickening agent of choice in a lot of high end kitchens. They’re gaining popularity because they are extremely neutral in flavor and are added in such low concentrations (usually les than 0.5% by weight), that they have no effect on color or flavor. One of the most commonly used food grade gums for this purpose is Xanthan Gum, which can be picked up at a lot of health foods stores.
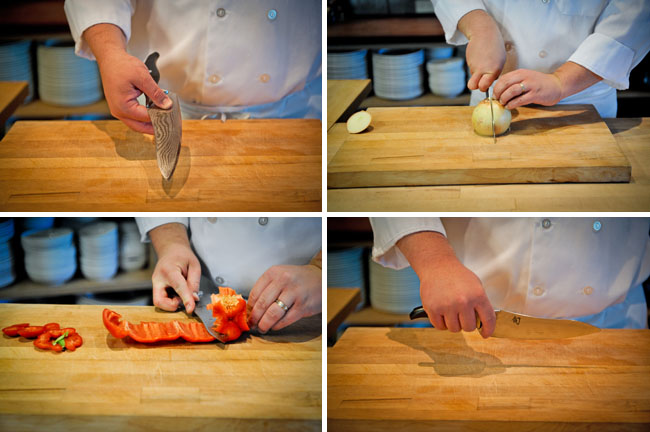
Choosing the right chef's knife is one of the most important decisions you’ll make when equipping your kitchen. Your chef’s knife is the number one tool you’ll constantly and consistently use. My advise is not to skimp and try and get off cheap.
You really don’t need any number of those crazy tools and gadgets that you see displayed at your local kitchen store. Avocado slicers, tomato dicer; what’s this, a lettuce knife? Please!
I like having gizmo’s and gadgets just as much as the next guy, but when it comes down to it, you only need two knives: a 10” chef’s knife and a 6-7” utility knife.
Why Only Two Knives?
When I first enrolled in culinary school, I was ecstatic to find $2,500 of my $55,000 dollar tuition would be put towards an extensive tool kit, including about 15 different knives. A couple months later when I begged my way into one of the best fine dining restaurants in San Francisco as an apprentice, I realized I really only needed two knives; a 10” chef’s knife and a 6” utility knife.
The first day I showed up, I brought my entire knife roll with me into their extremely small kitchen. After all, I didn’t know any better, I was nothing more than some amateur who’d been watching Emeril bam all over the screen and make all sorts of money and I thought to myself, “I can do this.” So I ask the poor shlup who was assigned to baby-sit me where I could put my knives.
“You don’t. Put your knife roll upstairs with the lockers, and bring down your chef’s knife and your pairing knife,” he said with understandable annoyance.
This is how I found out the hard way, and with much embarrassment, you really only need two knives in your kitchen, a Chef’s knife (preferably 10”) and a pairing knife. As I progressed forward with my skills but still understood the importance of minimizing my knife selection, I traded in my pairing knife for a 6.5” Utility knife. Here’s why:
My 10” chef’s knife is my go to blade when I need to slice, dice, mince, julienne or batonnet, but it becomes a little arduous when fabricating meat or performing more delicate cuts. Although at first it may seem a little awkward using a utility knife in place of a pairing knife, with practice it can be done.
I also use my utility knife for all the major meat fabrication I do on a regular basis, including breaking down and de-boning chickens, fabricating beef tenderloins into filets, and cleaning and portioning fish. Quite honestly, with a little practice and proper technique, your chef’s knife and utility knife will be able to handle 95% or more of your average workload. But knowing the secret that you only really need two knives in your kitchen isn’t enough. To make this secret work, you need to know how to choose a knife that’s right for you.
What To Look For in A Knife
When I go out to buy a new knife, no matter if it’s a chef’s knife, utility knife, or just a knife for fun, these are the three main things that I take into consideration; steel, handle and weighting.
The Steel
The first thing you need to address is what kind of steel you want. This is commonly overlooked when buying a knife but it should play an important role in your decisions once you understand the two major differences.
Although there are many types of knives manufactured by different companies using numerous kinds of steel alloys, your decision will pretty much come down to two choices: German Steel or Japanese Steel.
German knives are characterized by traditionally having a little bit of a thicker blade as compared to Japanese knives. This makes them a little more sturdy and less prone to breaking off a tip when dropped (which can and will happen). German knives are also traditionally sharpened to about a 22° angle, making them sharp but also sturdy.
German Knife Pros:
Sturdy and strong.
Hold their edge for a good amount of time
Easy to sharpen
German Knife Cons:
Thicker blade makes delicate cuts more difficult, such as slicing sashimi for sushi, or the fine julienne and Brunoise of vegetables.
Japanese knives on the other hand have a more delicate composition with a thinner blade that is usually sharpened to an 18-16° angle. This extreme edge makes them impressively sharp, but they don’t stay sharp quite as long. They’re also a little bit more difficult to sharpen.
Japanese Pros:
Sharpened to an extreme angle which makes them razor sharp.
Great for more delicate cuts such as sushi and fine vegetable work.
Japanese Cons:
Tend to be a little more difficult to sharpen than German knives.
Because they are sharpened to such an extreme angle, their edge is a little more fragile and won’t hold for quite as long. (There are some exceptions to this rule).
The Handle
When choosing a knife, you want to take into careful consideration the type of handle the knife has. It should comfortably fit the type and size of your hand. If you have a smaller hand, you’re going to want to buy a knife with a thinner handle. Conversely, if you have a larger hand, you'll need to purchase a knife with a wider handle. Someone with a larger hand who uses a thin handled knife will develop pressure points in the palm of their hand. This will tense their grip, leading to poor fluidity of movement and inaccurate cuts.
The key to having good knife skills is a knife you can hold with a relaxed and comfortable grip for an extended period of time.
Weighting
Finally, the third and final aspect you need to take into consideration when purchasing a knife is the overall weighting. But remember, don’t confuse weighting with weight. Too often I hear people bragging about how nice and light their chef’s knife is. “Hey, check this knife out, it’s light as a feather!”
Who cares? It’s not like your curling a 50-pound dumb bell every time you pick up a chef’s knife! What really matters is how the weight is distributed throughout the knife, or the "balance."
For longer knives, such as the 10” chef’s knife or a long slicer, the balance point should be right where the blade connects to the handle, meaning the blade and the handle are of about equal weight. The shorter the blade gets (such as a three inch pairing knife), the more handle heavy the knife will be. This will give you greater control over the confined and intricate movements you will inherently be making with a shorter blade.
Chef Knives I Recommend
Further Information
Watch our entire HD video series on knife skills.
Listen to SCS 1| Basic Knife Skills
Mashed potatoes are something that we all know and love. They make a great side dish to accompany your favorite meat entrée, and are so versatile that you can serve them with almost anything. Although most people understand the underlying principles of how to make mashed potatoes, there are some techniques and secrets that restaurant chefs employ to ensure that their mashed potatoes are better than the ones you make on “turkey day”.
![]() Mashed Potato Procedure
Mashed Potato Procedure
Peel whole russet potatoes and cut into manageable chunks. I’ll usually cut my potatoes into quarters lengthwise, and then cross cut them into pieces roughly measuring about 2.5 inches.
Place your potato chunks in an appropriately sized pot, add a couple large pinches of salt and cover with cold water. Starting your potatoes in cold water will allow the complex starches to cook more evenly.
Place the pot on your stove top, turn to high heat, and bring to a boil.
Once the water begins to boil, reduce to a simmer and cook until fork- tender.
When the potatoes are fork-tender, strain them off and make sure that all the water is allowed to drain out.
From this point, most home cooks would simply mash with a hand masher, add butter, salt, pepper, and possibly a touch of cream. There is absolutely nothing wrong with this method, but if you want your mashed potatoes to truly be the best that your dinner guests have ever put into their mouths, then keep reading.
Secrets to Making Great Mashed Potatoes
So what are the secrets that restaurant chefs use to make great mashed potatoes? Here they are, in no particular order:
Use a food mill. Passing your mashed potatoes through a food mill will give them a wonderful silky smooth texture. Do this first, before you add your butter and cream. If you like your mashed potatoes chunky - fine, then don’t mill them. However, silky mashed potatoes are much harder to come by in the home, and honestly, they just taste better.
Add enough butter to give your cardiologist a heart attack. The number one reason why mashed potatoes made by a restaurant chef will always taste better than yours is because they mix in an enormous amount of butter. A good place to start is about 1-2 ounces of butter for every large russet potato used.
Use European-style butter. Most fine dining chefs use European-style butter because it has a higher fat content. One brand that is commercially available to the home cook is Land O’ Lakes. It should say something like “European Butter” on the box. (If you haven’t figured it out yet, fat is KING.)
The creaminess from your mashed potatoes should come from the melted butter, not the cream. Add your butter first until the mashed potatoes reach their desired consistency, and then add a touch of cream for added body and texture.
Some chefs believe that melting the cream and butter together before adding them to the mashed potatoes allows the fat to coat the starch granules of the potatoes more evenly, giving it a better texture.
Season your potatoes well with plenty of kosher salt. The number one mistake that most home cooks always make is that they under season their food. If you made your mashed potatoes properly, they should contain an enormous amount of fat, which will coat the palate. To counteract this, a little extra salt is needed to really bring out the flavor.
What are some of your favorite things to add to mashed potatoes, and what secret tricks do you use to make them the best your dinner guests have ever tasted?